Part of the Media Manager's job is to make backing up camera media a boring task, one characterized by a total and complete lack of drama and requiring little to no interaction from other members of the camera department or larger crew. Let's take this opportunity to review what we see as an established set of practices for media offload, handling and backup on set.
When working on set as a Media Manager, or DIT — though we like to think of a DIT's purview as encompassing a broader, more interesting range of tasks — one of the most important things, other than actually making the backups themselves, is having a system that you and the camera assistants agree on to distinguish media that is ready to be formatted in the camera from media that has camera original footage on it that may or may not have been backed up. Some people use colored camera or gaffer's tape for this (for example, red tape applied to cards that have not been backed up and green tape for cards that are OK to format). Others put nothing on the cards themselves, since tape or residue can foul a camera's media bay, and use colored bins on opposite sides of a cart or table for this (i.e. a red bin on the left-hand side and a green bin on the right side). It doesn't matter what system you use, as long as everyone agrees and there is no confusion.
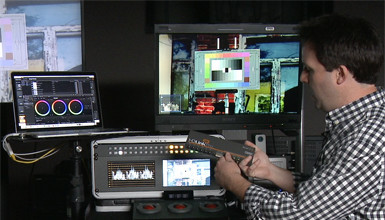
Many DITs will bring their own fast storage to set. It can often save time and speed up getting the camera media ready to record again to make an initial (verified) backup to one's own fast, local storage and begin the (often) slower copy to the drives provided by production. I say "often" because it's not unusual, at a certain budget level of production, to be greeted upon one's arrival to set with a plastic bag (often bearing the logo of a big box retail chain that rhymes with "Vest Guy") being handed to you by someone getting paid even less than you. In this bag, you'll often find a couple of hard drives emblazoned with words like green or eco-friendly, both of which are code for low or variable spindle speed, themselves code for slow. If you ask why these particular drives were purchased, you'll often hear that "they say 'backup' right on them," or "they were the cheapest." Suddenly, having fast interim, or what I call depot, storage doesn't seem like such a bad idea.
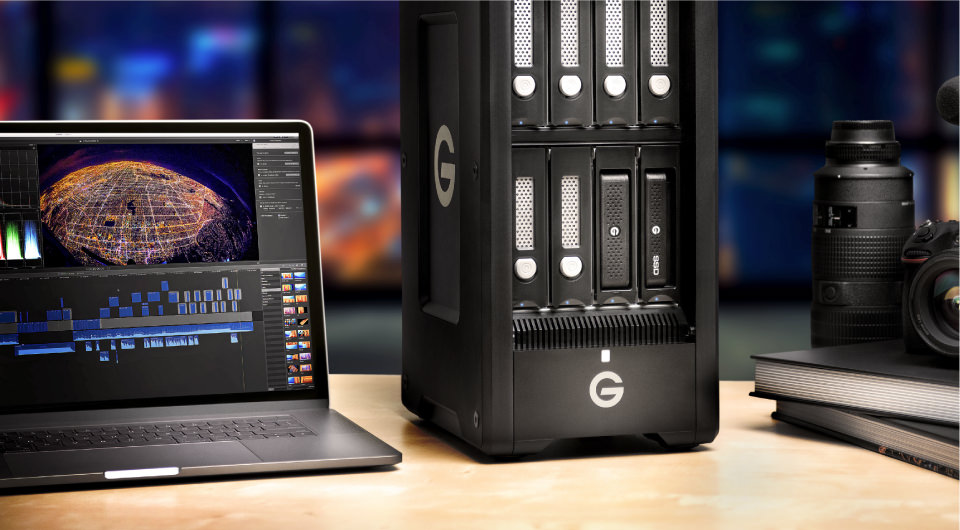
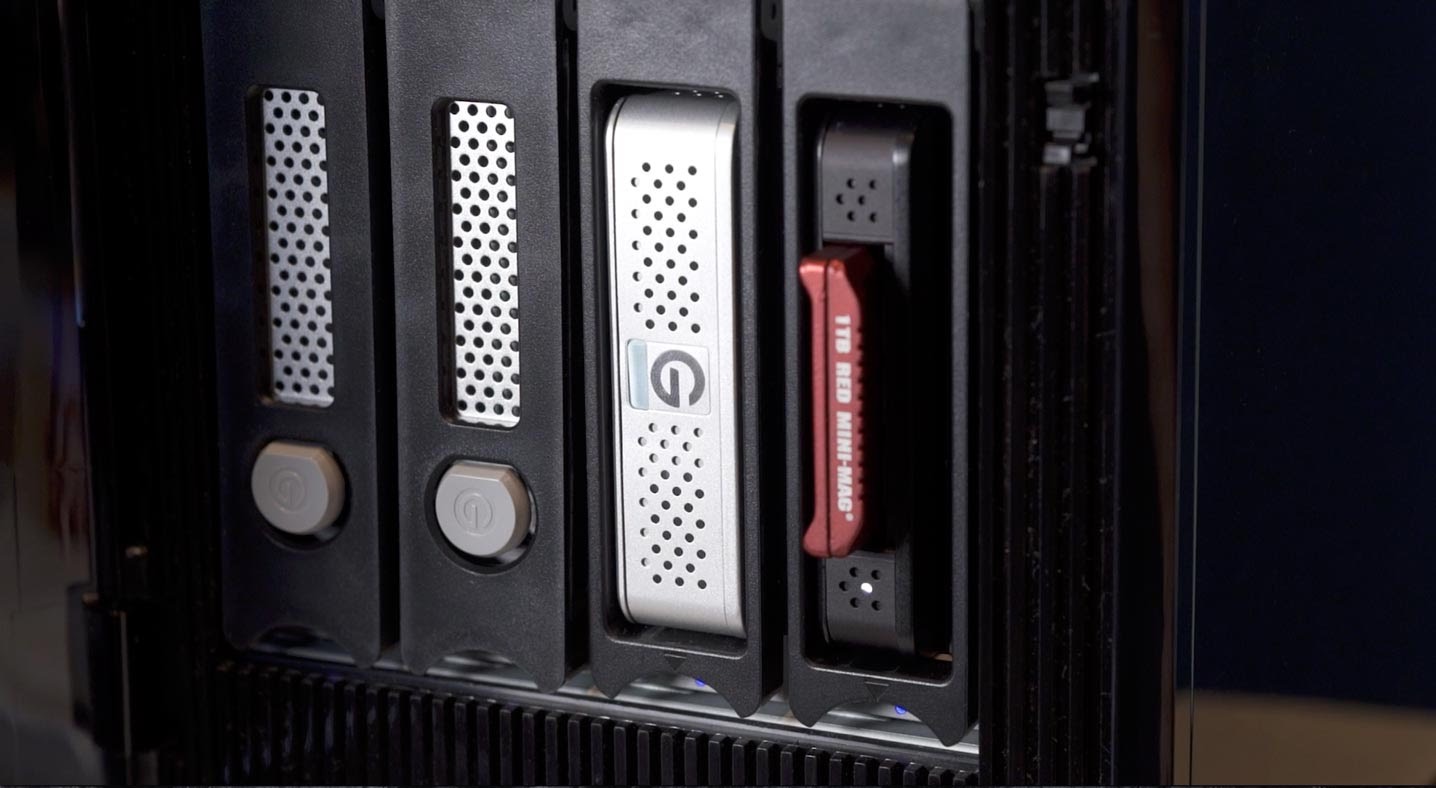
One option is the range of G-Speed enclosures from G-Technology. Their storage products have been a near-ubiquitous sight on sets for many years. Their G-Speed multi-bay enclosures have always provided rugged, reliable and redundant data storage for productions of all levels and budgets. Now, with their new G-Speed ShuttleXL enclosures and EV Series bay adapters, the range of tasks these rugged storage appliances can handle has greatly expanded. Using Thunderbolt 3, these flexible enclosures can handle media offloading and backup, footage ingest for post, as well as transform commodity SSDs into a blazingly fast new form of removable media. Several modules exist which allow direct insertion of proprietary camera media from RED, Sony, and others into the enclosure, saving you an additional all-important peripheral port on your computer.
Some clients don't mind if you make an initial verified copy to storage not owned by the production, especially if camera media cards are at a premium on the day, because it will ultimately get the cards back to camera faster so they can be used again. Other shows will strictly forbid generating copies to drives not owned by the production — so be sure to find out before backing up to your own storage.
Making the copies themselves is generally a non-event thanks to software applications like Imagine Products ShotPut Pro (now in version 6 and arguably still the industry standard), Pomfort Silverstack, and newcomers like Hedge, which sports GPU acceleration and a modern, beautiful interface. There are a host of others as well as custom solutions created by old-school DITs with more of a software engineering bent (Google 'UNIX rsync' for a deep dive into verified data copying). Whichever solution you choose, the basic proposition behind checksum-search based copying is that a unique and bit-perfect data "fingerprint" is calculated for each file on the camera media card and then calculated again on the destination copy. If any aspect of these highly accurate fingerprints differs when compared, an error is generated to let you know.
Once the first backup has been made, the files should be spot-checked using a player application like VLC. At this point, you should be looking for obvious corruption: large areas of solid color, jpeg-like artifacts, audio drop-outs (if sync sound was recorded in-camera), etc. Other things to look for are image defects like moiré (a "beating" or screen-door pattern in fine man-made fabrics or surfaces) or gross over- or under-exposure. If you find anything that doesn't look right, be sure to very discreetly and quietly let the DP know as soon as possible (or, if you don't have access to the DP, the 1st AC, technically the head of the camera department). If you think that covering for the DP in this way will earn you her favor if there's something really wrong with the picture that only you know about, you are dead wrong. Communicate issues early and often, but always with discretion and professionalism.
After spot-checking, it's time to begin the slower copy to the production drives (the ones that will go back to the production company or their off-site storage and/or to post). I always generate some kind of report as well for each card downloaded (ShotPut Pro 6 and Pomfort Silverstack both have very nice reporting tools) and try to find out what format production wants beforehand (PDF, HTML, Excel, etc.) for the reports.
Once you have a minimum of 2-3 known verified copies of a camera media card's contents, it's time to return, or otherwise make it available, for reuse. Opinions differ on the exact protocol to use here (see above about having an agreed-upon, confusion-free system that all involved can abide by) but some media managers return cards to camera with the original footage still on them, which extends the time possible to rectify a catastrophic mistake (assuming one can retrieve the card after it has left the offload area but before it has been formatted in the camera). Others prefer to format or erase them preemptively, so that when inserted into the camera the assistant will be prompted to format them. This goes for returning rented cards to a rental house as well — you would generally not want to allow raw footage from any production to be available outside of set, other than for the specific purposes its owners intend, but if there is some question about whether copies made are "good," or whether additional copies from cards received late in the day may be needed, it can be tempting to not format the last round of cards before they are returned to rentals. I can't personally recommend this practice.
Hopefully, this article has helped to demystify the mindset and orientation around managing camera media on set. If you're new to making verified copies, you may want to check out this YouTube playlist from Imagine Products, makers of ShotPut Pro, with tutorials on its use.
It also helps to use a consistent folder structure to keep track of everything. A well-known DIT and DP in the New York City area, Charlie Anderson, made a cool (and free!) tool for this. In fact, Charlie's entire Dork in a Tent site is well worth a browse.
By way of parting, make sure to check out Screenlight's What is a Digital Imaging Technician, The Black and Blue, and Jonny Elwyn's blog which should help inform and answer questions about media management and the broader role of the DIT in modern productions.