


Start With The Space
The background will be the best chance you have to expand upon the story of the interviewee. It can show more about who they are than even cutting away to B-roll can. Beware of relying on natural light as sunlight can change as the day passes. It's best to avoid places lit by sunlight when possible or to augment that light with powered sources.
Depth and distance will let you use a longer, more flattering lens, throwing the background out of focus and separating your subject. For this reason, it's good to have twice as much space behind the subject as the distance from the subject to the camera. You also may need to add lighting to your background so that it is not dramatically darker than your lit subject.
Lighting
The industry standard for lighting faces in interviews is to use tall lighting. This means that the key light, or brightest side of the face, is the one furthest from camera. To achieve this, we place the camera first, then the interviewer (which will determine the subject's eye-line), and then the key light. For this video, we used an undiffused ARRI SkyPanel S60-C on 40% power. This was strong enough to give correct exposure but not blind the subject.
To get soft, flattering lighting that doesn't cast hard shadows, we want a source the same size as the subject, at that distance from the subject. Meaning, we would want a two foot light source two feet away from the subject it's lighting (a two foot part of someones body, for example). If you want to keep the light further away, you can extrapolate: use a six foot light source, six feet away to get the same result on a full shot of a six-foot tall person.
To illuminate the darker side, we used a four foot Quasar Science Q-LED tube set to daylight, same as the SkyPanel. This is called a 3/4 kicker, or scratch light, that creates dimension but needs to be subtle as well. We set it to 5% in order to avoid creating too noticeable a highlight.
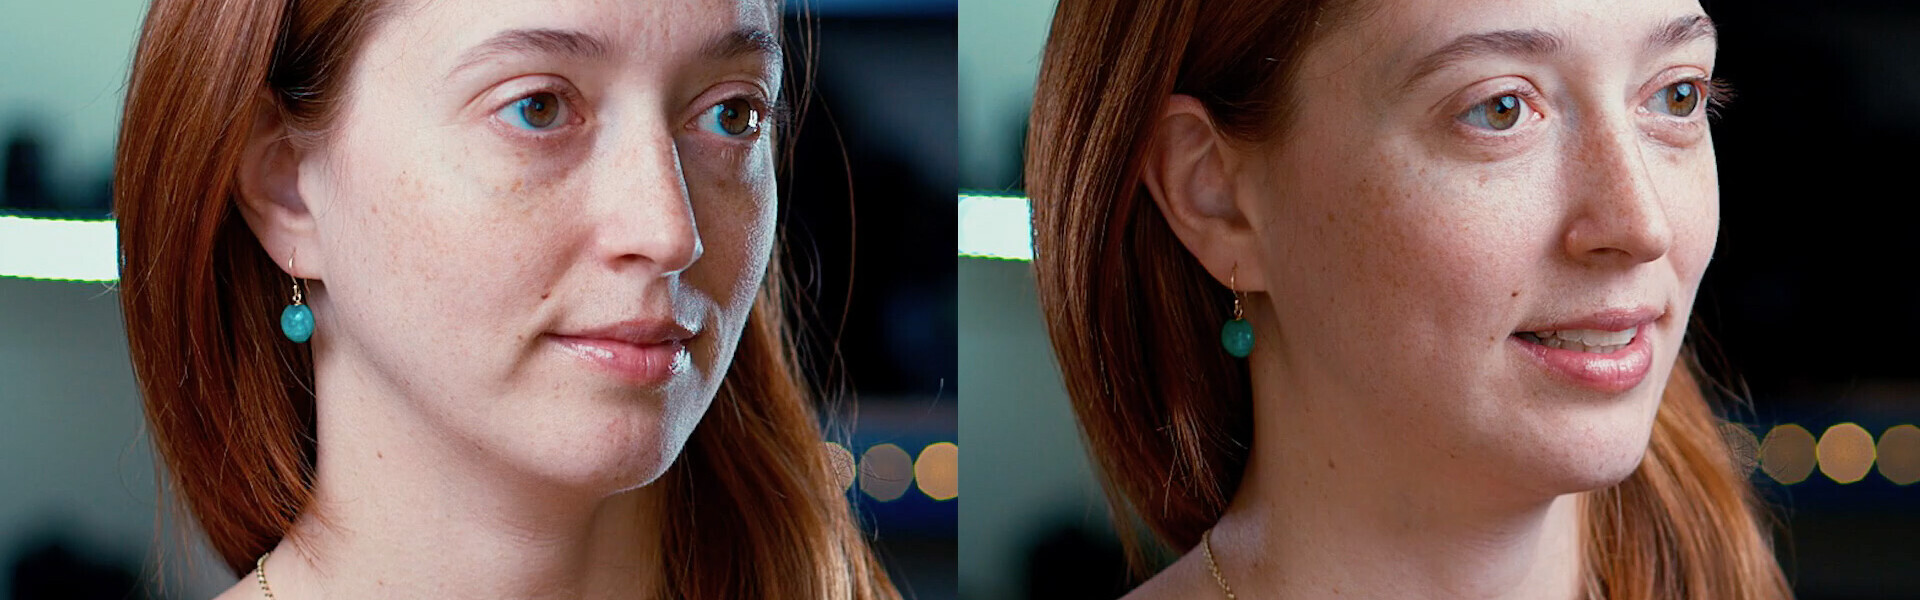
Finally, we place a fill light behind camera to control ratio. Ratio is the relationship between the dark and light side of your subject's face. It's a great tool for controling the tone of a interview. The higher the ratio, i.e. the darker the dark side, the more serious and tragic the subject can seem. The lower, or brighter the dark side, the more approachable. Be careful of evenly lighting both sides of the subjects face – an incorrect ratio can make them seem more like a product, or come across as fake.
Depending on the person's eyes, you may want to add some lighting on their eyeline as well. If a person looks down or has deep-set eyes (like I do), an eye light can prevent them from looking shifty and untrustworthy.
Camera
Lens choice is probably the most important choice you'll make as a DP. Longer lenses look great and can flatter the face, but too long and you will make the background totally invisible. Here we went with a 50mm, which on the Super 35mm sensor of the Canon C200 has the equivalent FOV as a 70mm on a full frame camera. I find this to be a perfect middle ground; it is different enough to cut with a second camera without being too extreme, and it still shows plenty of the background we chose. Every situation will be different, and it's up to the DP to know their options. Do your best to chose the one that best serves the story the director is trying to tell.
Second Angle Options
Unless you’re planning on shooting B-roll, it is extremely helpful to add a second camera to intercut with your main angle. This will help to avoid jump-cuts when your subject pauses, misspeaks, or says "um" too much. In this video, we added a lower, wider camera to the left side of the main camera. Another option would be to stack the cameras almost on top of one another. Having a second, moving camera on a dolly has also become a popular option, though it requires expensive hardware or a second operator.
If you’re shooting in 4K and delivering a 2K or HD master, you also have the freedom to punch in on your images in post, giving you other angles to choose from. If this is a possibility, select wider lenses than you otherwise would in order to give yourself some room to move.
Summary
It is important to understand all of the many factors at work in something as common place as the interview shot. By taking these details into account, you can decide how to best tell your story with the tools you have.
About Rubidium Wu
Over the past 2 decades, Rubidium as directed and produced numerous projects from art documentaries to commercials for Nintendo and Sony PlayStation. His Kickstarter-funded web-series Silent City gained over a million views and was featured by the Wall Street Journal and the New York Post. His first feature, the thriller Brooklyn Tide, shot with the original Canon C100, is available on Amazon Prime. Rubidium explores the techniques and technologies that continue to transform filmmaking on his YouTube channel, Crimson Engine. He will be teaching a Canon C200 Masterclass next month in New York.