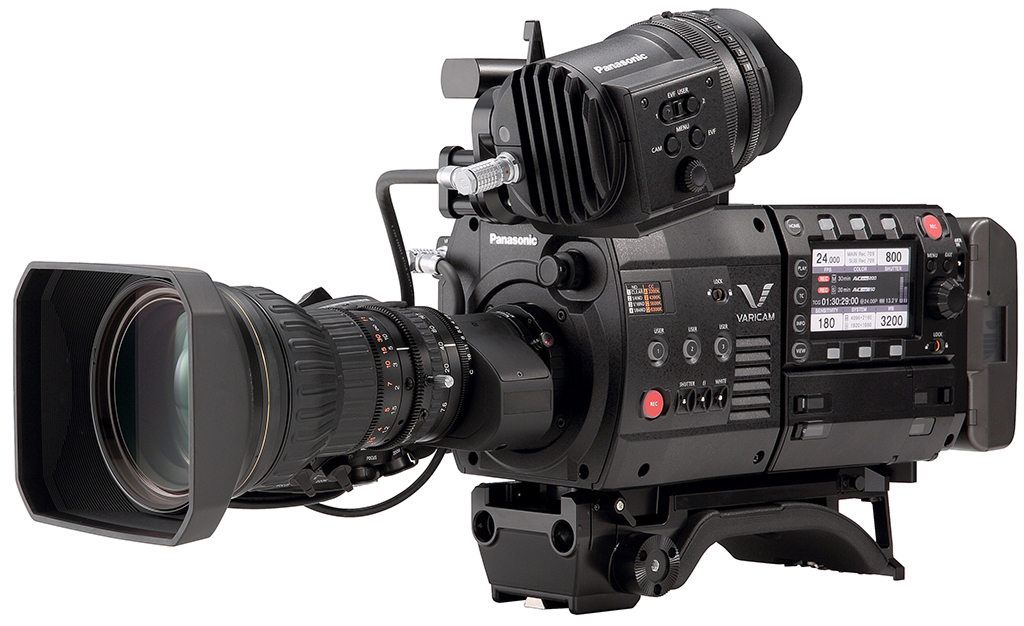
In the latest firmware updates for both of these cameras, Panasonic has greatly improved the file naming conventions, allowing both the main (master) recording and sub (HD/Proxy) recording to have the same file name. This greatly simplifies the whole process and truly makes these cameras unique and powerful. Below is an outline of how to set up both cameras for action, and steps for importing footage into Avid, Final Cut Pro X, and Premiere. I'll also outline a basic finishing workflow with DaVinci Resolve and 4K V-log content.
Camera Recording Setup
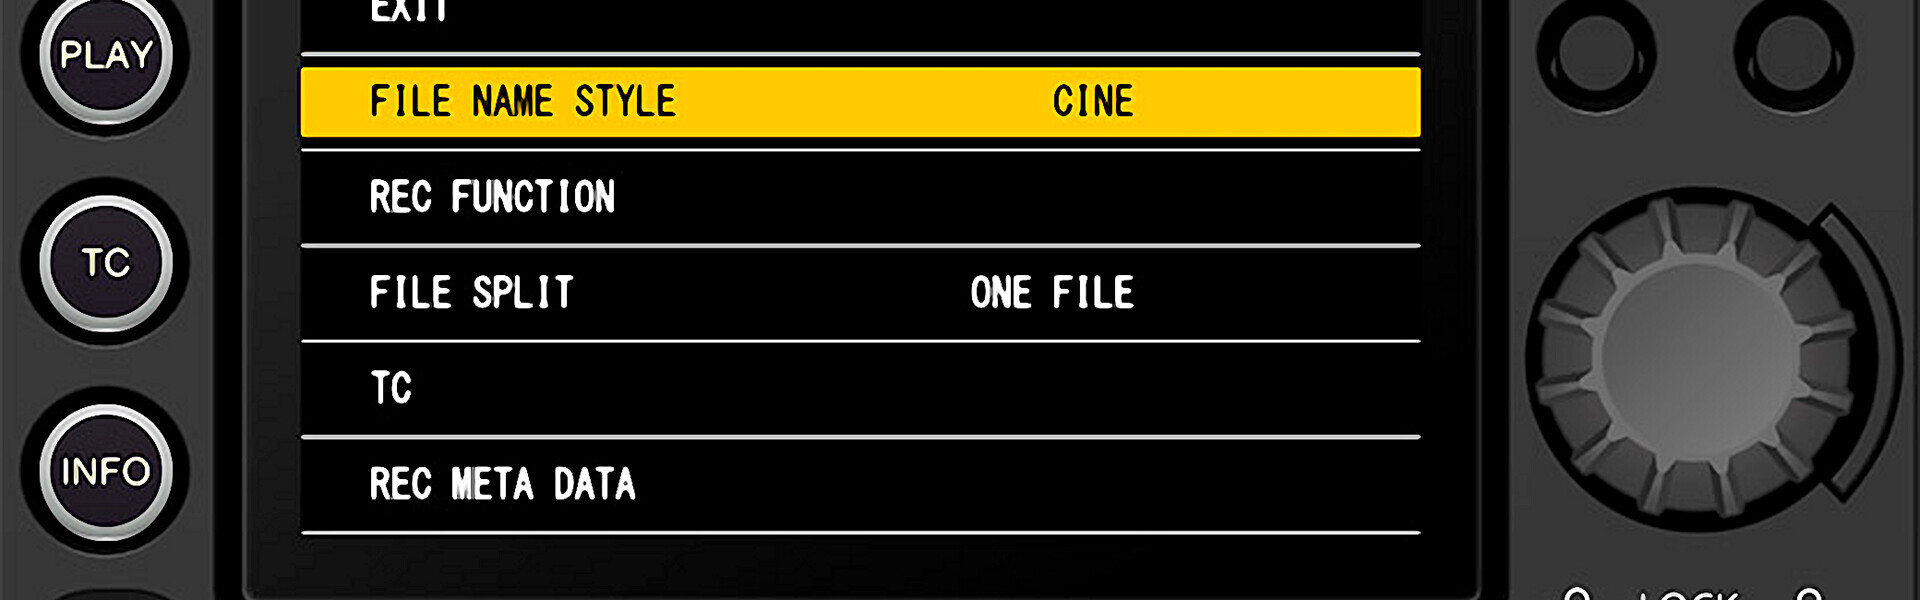
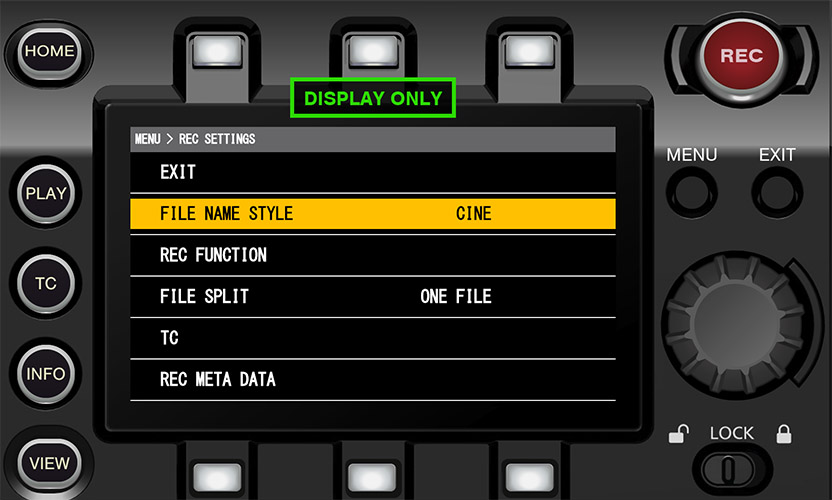
The first step is to set up the camera for recording with simple 'Cine' style file names. This gives your files the standard naming convention found in ARRI, Sony, and RED cameras, which is camera index, reel count, and clip number. So for camera index A, reel 1, clip 1 the file would look something like A001C001_.mxf. To enable this, go to the Menu → Rec Settings pages, and set File Name Style to CINE.
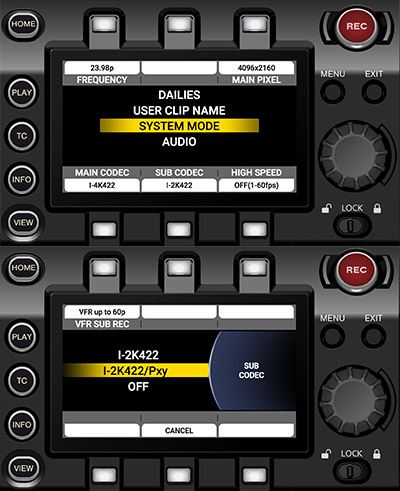
 The next step is to set up your main and sub recordings. You can do this under the System menu. I'll set the main recording to 4K 422, and the sub recording to 2K422 /Pxy; this enables both 2K recording, as well as a proxy recording. In the VariCam LT, you can only enable proxy recording here. You cannot select ProRes as a sub recording option at this time, only AVC-Intra and an H.264 encoded MOV proxy.
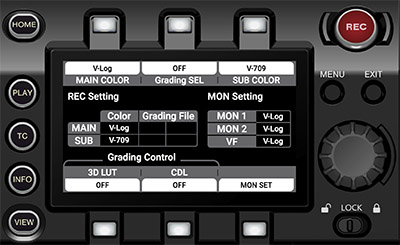
 Now let's set up the color options for each recording. Under the Color menu, set the main recording to V-Log, and the sub recording to V-709. This gives us Log on the main and a baked-in Rec709 LUT on the sub. The proxy recording always get the same color as the sub recording.
 Lastly, let's add some additional burn-ins to our HD and Proxy recordings. This will add lines and text to each recording that can help the post process. To do this go back to the System menu and then scroll up to Dailies. You can then enable a Frame Mark and burn in text.
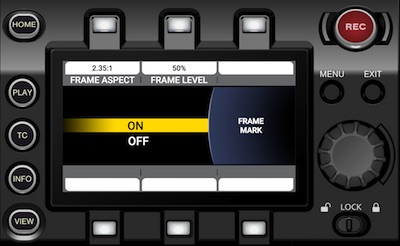 As you can see in the picture above, I set the frame mark to 2:35:1, which at 50% will gray out anything outside of that area in my frame.
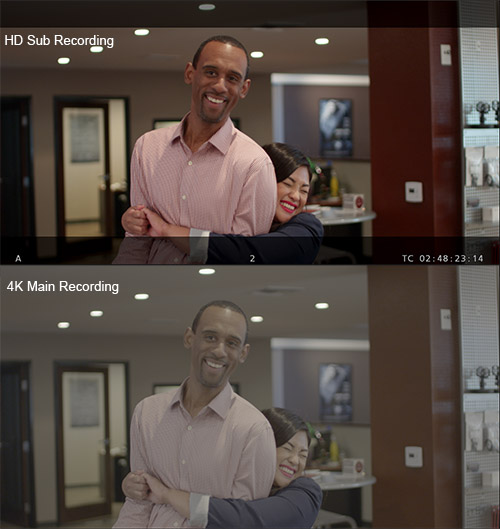
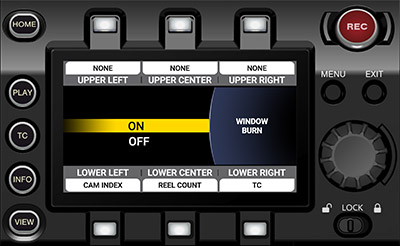 Then I've added some burn-in text to the bottom including camera index, reel count, and timecode info. Here is an example of the result of both 4K and HD recording, note that the LUT and burn-ins are applied to the HD material, while the 4K main recording remains in V-Log with no burn-ins.
Camera Files
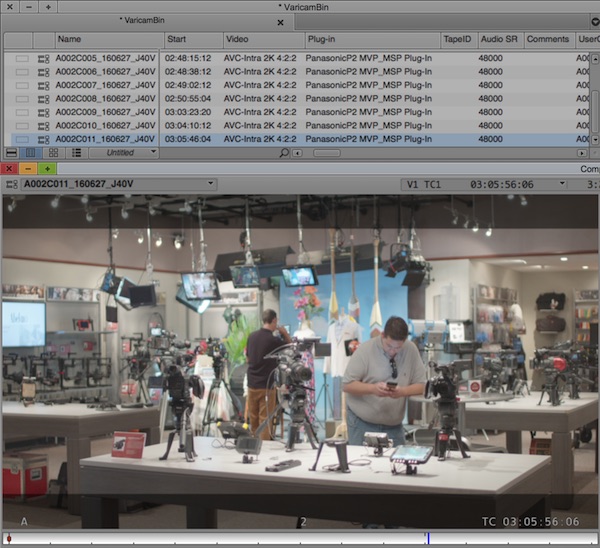
Now that the camera is set up correctly, you'll be recording three streams on the 35 and two streams on the LT simultaneously. When you go to download the media from the VariCam 35, you'll find the 4K material on your ExpressP2 card, and HD & Proxy material on your MicroP2 card. On the VariCam LT the ExpressP2 card will contain both 4K material as well as Proxy material.

As you can see in the image above, the main recording and sub recording files all have the same name and are located in the same folder structure. Proxy material is stored in the Proxy folder. The main recording (ExpressP2 card) has the name of the camera and reel number, while the sub recording gets a unique name. Download the footage using your preferred media management utility -- ShotPut Pro or Pomfort SilverStack are my favorites. I've downloaded the HD and Proxy material to an editing drive, and the 4K material on a separate drive for matching back to later. Adobe Premiere Workflow Adobe has supported the full range of Panasonic AVC-Ultra codecs for some time now, so working with VariCam 35 or LT material is pretty straight-forward. The one exception is the 2K-LT codec found in the Varicam LT, which is used for high-speed (slow-mo) recording. This format is not yet support in Premiere, so for now you'll have to import this footage into something like Davinci Resolve and convert it to ProRes, or another format, before bringing into Premiere. Premiere will work natively though with either the HD or 4K AVC-Ultra footage, but for the sake of this article I'll just import the HD footage. To do that just go to your media browser and the card or location of where the footage now lives.
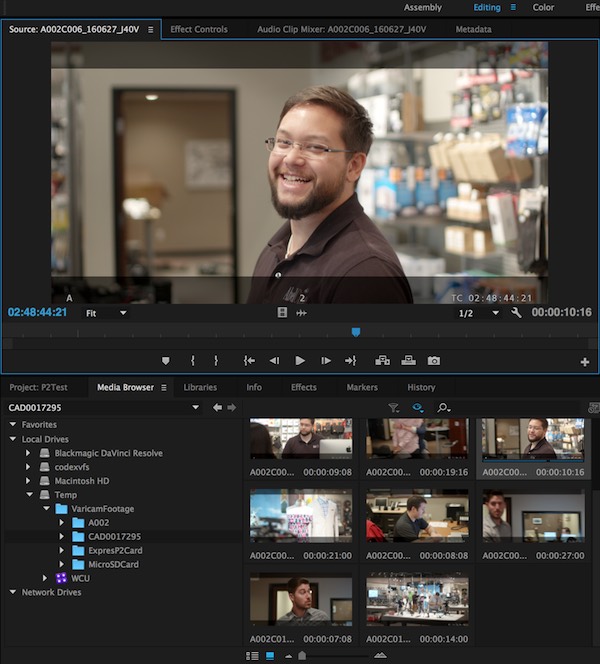
As you can see in the image above, the clips are showing up and are ready for import. Select your clips and go to File → Import to bring them into your project. These files are edit-ready, with a LUT already applied, so we can just start cutting. Apple FCP X Apple was slow to update with support for all of Panasonic's codecs, but with the latest version, FCP X has full support for everything up to 4K. To import the footage, you just need to follow standard procedure: just click the import button or go to File → Import → Media.

As you can see, FCP X can read all the clips with its import utility. Select your clips and click the import button. These files are also edit-ready, with a LUT already applied, so we can just go straight to cutting. Note that FCP X has the same limitation as the Premiere, it does not support the 2K-LT codec found in the Varicam LT, which is used for high-speed (slow-mo) recording. This format is not yet support in FCPX, so for now you'll have to import this footage into something like Davinci Resolve and convert it to ProRes, or another format, before bringing into FCP X. AVID MC 8.5 The latest version of AVID fully supports all Panasonic VariCam codecs, including 4K content. You'll just need the latest AMA plugin to work with it. You can download that plugin directly from Panasonic. Once installed you can import via the File → Input → Link to Media option.
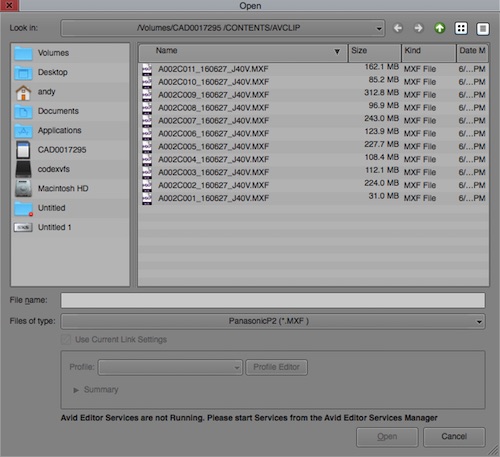 Make sure you select Panasonic P2 as the file type, then navigate to the folder containing your media. You'll find the full-resolution HD clips in the Contents/AVCLIP folder. Once linked to in your bin, you can start working. These files are also edit-ready, with a LUT already applied, so we can just start cutting.
DaVinci Resolve 12.5
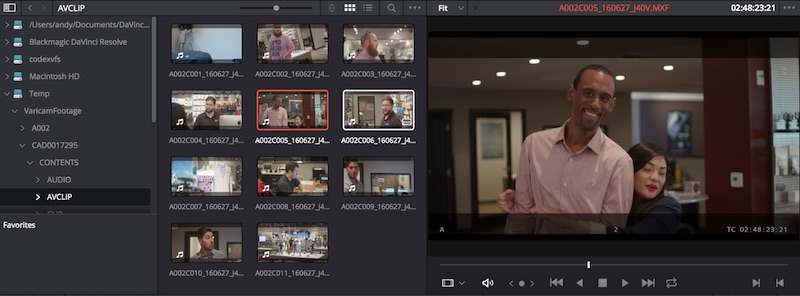
Resolve supports a wide variety of formats and was an early adopter of the Panasonic AVC-Ultra formats. You can easily import the footage through the Resolve media import tool. Just navigate to the Contents → AVCClip folder for each card, and you'll find the MXF files. Just drag the files into the media pool, and you can start color grading or editing in Resolve.
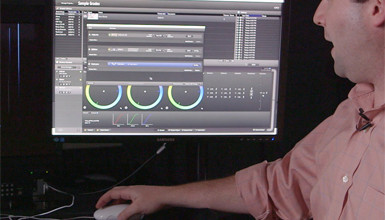
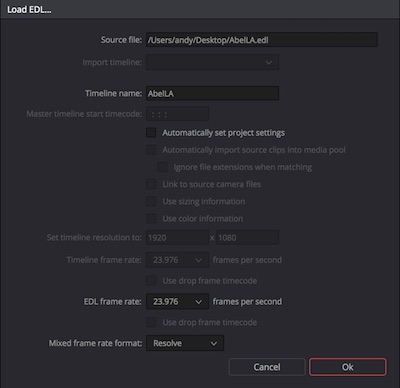
 Now to really show the power of the VariCam workflow, lets import an EDL (or XML) file that was edited off the HD footage, and have Resolve conform it to 4K. To do that, first cut a sequence in HD with any of the NLEs mentioned above. I'll use Premiere in this example, and cut a short sequence from my HD footage. Then export out the sequence as an EDL.
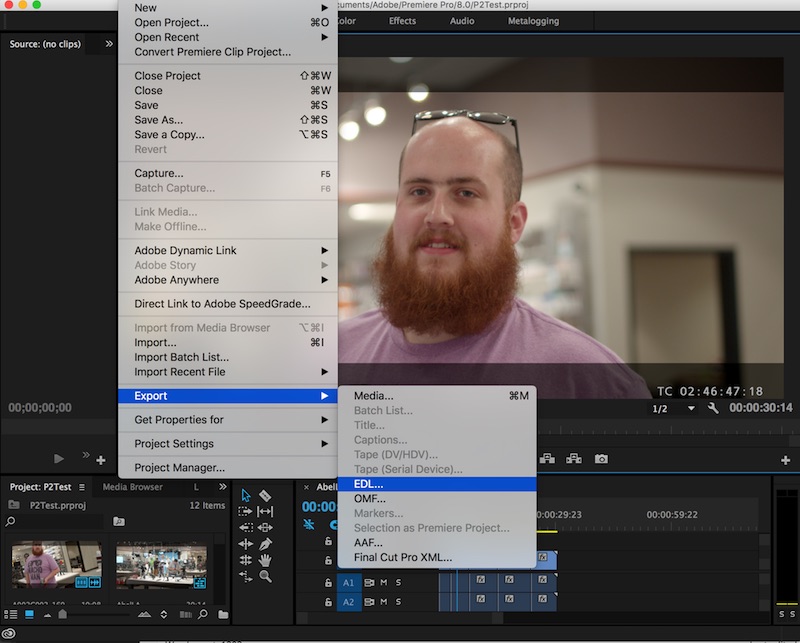 Then open a new project in Resolve, and import all the matching 4K content into the media pool. Then go to edit tab and choose File → Import AAF,EDL,XML.
 Resolve will automatically link to the 4K material in the media pool; now you are ready to start grading your material. You might want to download the V-Log to 709 LUT to use with this footage.
 VariCam footage is now widely supported, and the workflow is really built to make the post process easier. For anyone who has worked with the VariCam 35 or LT, what are some of your workflow tips? Let us know in the comments. To learn more about the VariCam 35, be sure to stay tuned for our next VariCam Quick Start or VariCam Intensive workshops!