Well yes, but there are a couple of important points to keep in mind - for instance, it only works in frame rates below 30P (which is what we use most of the time anyway). Additionally, both the full-resolution and proxy videos have the same gamma. That is, when you are recording S-Log2 in 4K, you also get S-Log2 on the proxy. Keep reading for a step-by-step guide to using the proxy recording mode in-camera and in post.
OPTION A: 4K & HD on One Card
1) First we have to set up the camera to record in 4K video mode. The camera only records proxies when recording 4K XAVC video, not Raw, or any HD format.
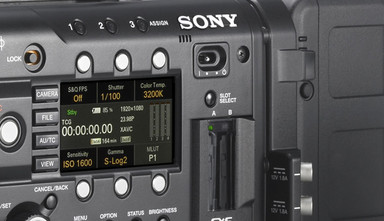
Under System Setting → Record Format, set your Format to XAVC 4K

Next you have to enable the Proxy recording.Under Recording, set Proxy to On

Now you're all set to go, but note that this option will be disabled if you go above 30P in the camera.
2) Record something, something good.
3) Now connect your SxS to your computer and launch Sony's Content Browser. Make sure you have the latest version (2.1 as of this post).
Go to the Content Browser Preferences panel and click on the Play tab. Notice under MXF Playback Mode there are two options. You can always play the Full Resolution media or opt to play Proxy media if available. Choose Proxy for now.

View one of the video clips you just recorded and notice that in the upper left hand corner of the viewer it says XAVC Intra 4K Proxy. That means your proxy file was recorded properly and you can use it to preview what the 4K will look like. If you don't see this, go back to your camera and make sure everything was enabled.

Now that you've confirmed that everything is working, go ahead and download the card to a hard drive.
4) Open the downloaded SxS card and you should see a folder called XDROOT. Inside that folder, you should see several more folders including a folder called Clips and another called Sub.
Clips is where you'll find your full-resolution material and Sub is where you'll find your proxy material. Look in both of these folders and you'll notice that the MXF clips have very similar names. The only difference should be that the clips in the Sub folder have the letters S02 at the end of each.

All the clips now have matching proxies, so let's dive into actually using them in a workflow.
5) Sony Content Browser does not currently have the ability to send proxy clips into an NLE. This is something that may change in the future but for now we have to manually import these clips into our NLE of choice. So let's go back to the Sub folder and get to work.
You may choose to rename these Sub clips so that they have the exact same file name as the full-resolution material (usually renaming a clip is a bad thing, but in this case we can do it without much consequence). Keep in mind that renaming the clips will stop you from viewing the proxy material in Content Browser. Remove the S02 from the end of each clip if you want; this will make it much easier to match back to your 4K material later.

Now let's import these clips into our NLE.
AVID MC - Avid supports the MPEG2 (XDCAM) format with an AMA plugin (the newest version was just released yesterday). Download, install, and launch Avid. Once installed, you can import these files through the Link to AMA Files option. Point directly to the Sub folder clips and they should populate your desired Bin.
FCP X & 7 - Final Cut does not have native support for these MPEG2 format clips, which are wrapped in MXF. Content Browser isn't any help now either. However, there is a tool that will convert this type of clip to MOV, which is what Final Cut wants to see: the old Sony software called XDCAM Transfer. This tool is no longer updated but still does the job. Download the latest version and install; when first launched it will ask you where you want to import clips, make sure to specify this destination as it is where your MOV converted clips will land.
![]()
Now click on the Add button in the lower left corner of the program. Locate your Sub folder and the program should show you all of the found clips. You can use XDCAM Transfer to preview the Proxy clips, edit metadata on them, and even rename the clips if you like. When you're ready, click Import in the lower right corner and it will start making the MOV clips for you.
Premiere 7 & CC - MXF support in Premiere is improving all the time so the Sub folder clips should work right away in Premiere CC. For Premiere 7, use the same steps found above for FCP X & 7.
6) Once all your clips are converted (if necessary) and imported, go ahead and do some editing - good edits only please.
7) After you're done editing, you can export an EDL or XML file to your color grading program of choice for finishing. If you are using Resolve you can use the same basic process that I showed in my F55 Raw and HD Workflow blog.
That's it for the workflow if XAVC and HD are recorded on the same card, but there is another in-camera option that might be a bit easier for others.
OPTION B: 4K & HD on Two Cards
For those of us that find the above solution a bit too tedious, there is an option in-camera to copy the proxy clips from one SxS card onto another. The camera cannot record to two cards at once, so it has to copy them after the recording is finished. This process takes the proxy clips on the 4K card and makes them seem like a normal recording on the second card. This means that your camera delivers two cards, one with 4K, and the other with HD. Here are some simple steps to get this set up.
Follow steps 1 & 2 above. Now insert a second SxS card into your camera, which is were the HD material will copy to. Then go to the Thumbnail view on your camera - you can get there by clicking the View button on the outside of the camera and then the Thumbnail option will appear on the sub display.
Once in the Thumbnail display, click the Option button on the outside of the camera. This will bring up a screen with the option to Copy MPEG2 Proxy data. Select that and the camera will start copying between cards.

The copy process goes surprisingly fast in the camera. Once this process is done you'll have two SxS cards: one with 4K and one with HD. You can work with the HD card as normal through the post process.
If you're interested in learning even more about the Sony F55, be sure to keep an eye out for upcoming F5/F55 Intensive workshops on both coasts!