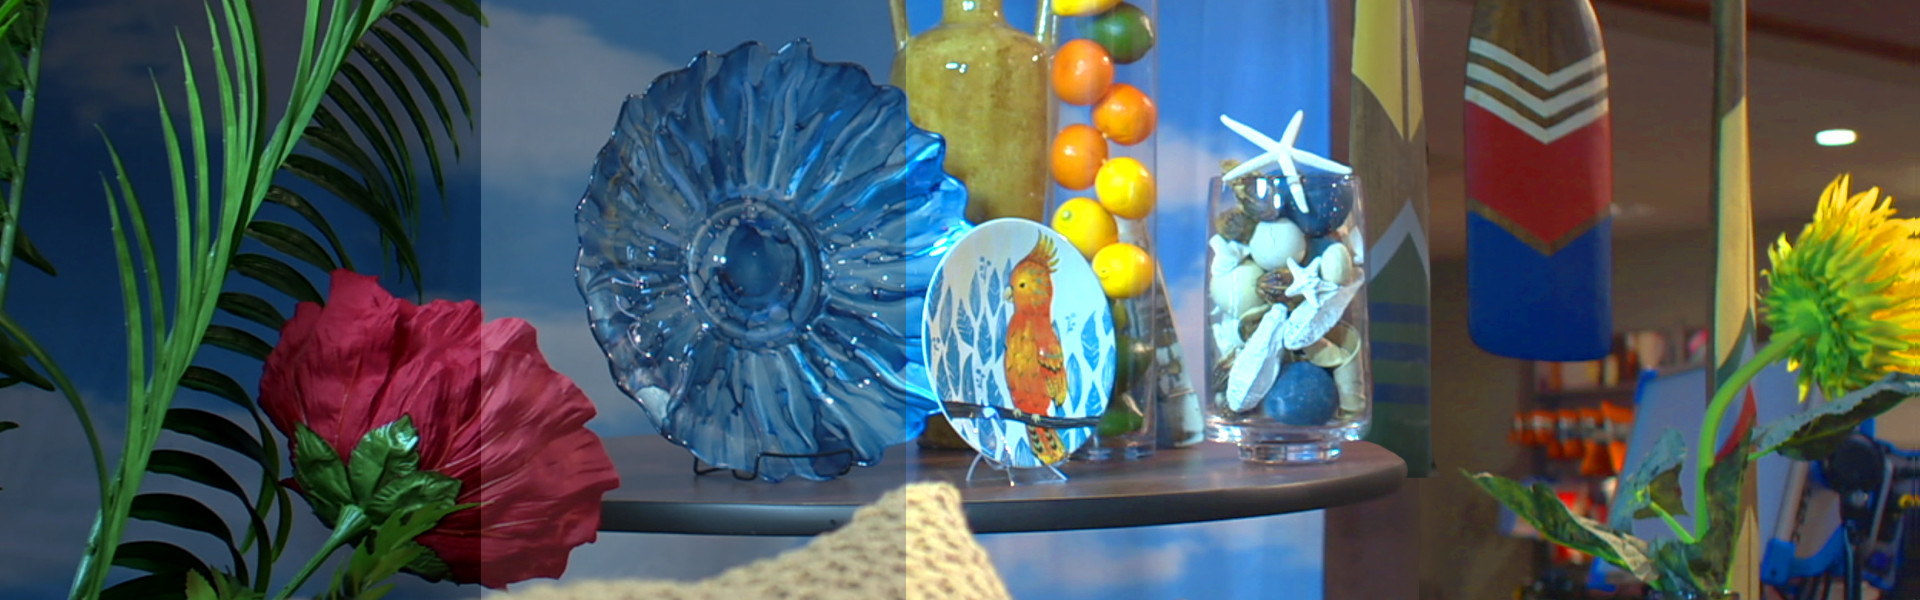
Here is a quick side-by-side comparing the standard scene file 5, called CINE V, with the first look I created called CLEAN.
 You can download the full images for each look here - F5 CINE V & CLEAN. The scene files can be downloaded onto an SD card (from the link at the bottom of this post), or manually typed into your camera. Keep reading below for a look at each scene file and why I created it.
Scene File 1 - CLEAN
 The 'CLEAN' look is intended to give the cleanest possible image in terms of noise. It uses the NORM 2 color matrix as well as reduced details, which both help with noise reduction. I also increased Coring slightly, which removes detail added in noise. The gamma mode used is Cine V, which produces good dynamic range but also maintains contrast. To further increase this contrast, I also reduced my Master Pedestal by 2.
Here are the full settings for the look (any omitted settings were left at 0 or default):
Detail: -5
V. Detail: -5
Detail Coring: +2
Chroma Level: 0
Master Ped: -2
Gamma: Cine V
Matrix: Norm 2
Scene File 2 - RANGE
 Building on the settings in the clean look, I wanted to make a setting that would also increase the dynamic range of the camera. The first change is going to gamma mode Cine D, which gives the camera more information in both the highlights and low light areas. Next, I increased my Master Pedestal by 2, which pushes up the black areas a bit more. Then I decreased my chroma level by 2 to give me a bit more adjustability in post color correction. The result is a rather flat image, but in post I should be able to do a lot with it.
Here are the full settings for the look (any omitted settings were left at 0 or default):
Detail: -5
V. Detail: -5
Detail Coring: +2
Chroma Level: -2
Master Ped: +2
Gamma: Cine D
Matrix: Norm 2
Scene File 3 - 5DMK2
 As the name suggests, this look is designed to match up with the 5D Mark II HDSLR from Canon. It is hard to make a perfect match, but I think it comes pretty close. To get the smooth look of the Canon I reduced detail and vertical detail to -7. Then I reduced the Master Ped by 3 to get a contrasty look. Finally, I changed the matrix to NORM1 and reduced the chroma level slightly to match the colors of the two cameras.
Here are the full settings for the look (any omitted settings were left at 0 or default):
Detail: -7
V. Detail: -7
Detail Coring: -2
Chroma Level: -2
Master Ped: -3
Gamma: Cine V
Matrix: Norm 1
Scene File 4 - CONTRAST
 This look is for anyone wishing for more contrast in their image, and not too worried about having adjustments in post. The easy way to get a contrasty look is to use the B.Press gamma mode, and I combined that with a Master Ped reduction. I also reduced the Chroma level a bit to give it a stark feeling.
Here are the full settings for the look (any omitted settings were left at 0 or default):
Detail: -4
V. Detail: -4
Detail Coring: 0
Chroma Level: -4
Master Ped: -3
Gamma: B. Press
Knee: Mid
Matrix: Norm 2
Scene File 5 & 6 - Cool & Warm

 A while back, I wrote a blog about using color offsets to create a cool or warm look. This process is similar to using cool or warm white cards on set. The next two scene files are the same as the Contrast look but with warm or cool offsets applied to the different white balance modes.
Here are the full settings for the look (any omitted settings were left at 0 or default):
Detail: -4
V. Detail: -4
Detail Coring: 0
Chroma Level: -4
Color Temp Ach: -3 (warm) or +3 (cool)
Color Temp Bch: -3 (warm) or +3 (cool)
Master Ped: -3
Gamma: B. Press
Knee: Mid
Matrix: Norm 2
You can download these scene files here - AbelCine AF100 Looks, and they can be loaded on to an SDHC card and into your camera. Also check out the scene file recipe list over on DVXuser.
UPDATE: A couple people mentioned some differences in my saved settings, so I adjusted them. Now the AF100 looks match my descriptions.